Facebook provides you an opportunity to create a business account to add another method for your resort to reach its marketing goals. With a business page, you can create advertisements that appear on targeted Facebook pages and allow you to reach a wider audience. With just an email address, you can quickly set up and customise your own business account on Facebook.
We have previously posted a blog on how to create Facebook for your business but times have changed and Facebook has made some new changes to the process.
Here’s an updated step-by-step guide on how to set up your Facebook Page for your Resort:
1. Load www.facebook.com and click the "Create a Page for a celebrity, band or business" link at the bottom of the "Sign Up" section. If you’re already logged in, click on Adverts and Pages on the left menu the click on +Create Page. It will take you to the sign up page for Facebook Pages.
2. Click the "Local Business" and select “Hotel/Lodging” in the drop-down menu.
3. Type in your resort name, or the title that you want your resort to be identified as, in the "Page Name" text field.

4. Tick the box that certifies you to be the official representative of the business. Click the "Create Page" button when ready.
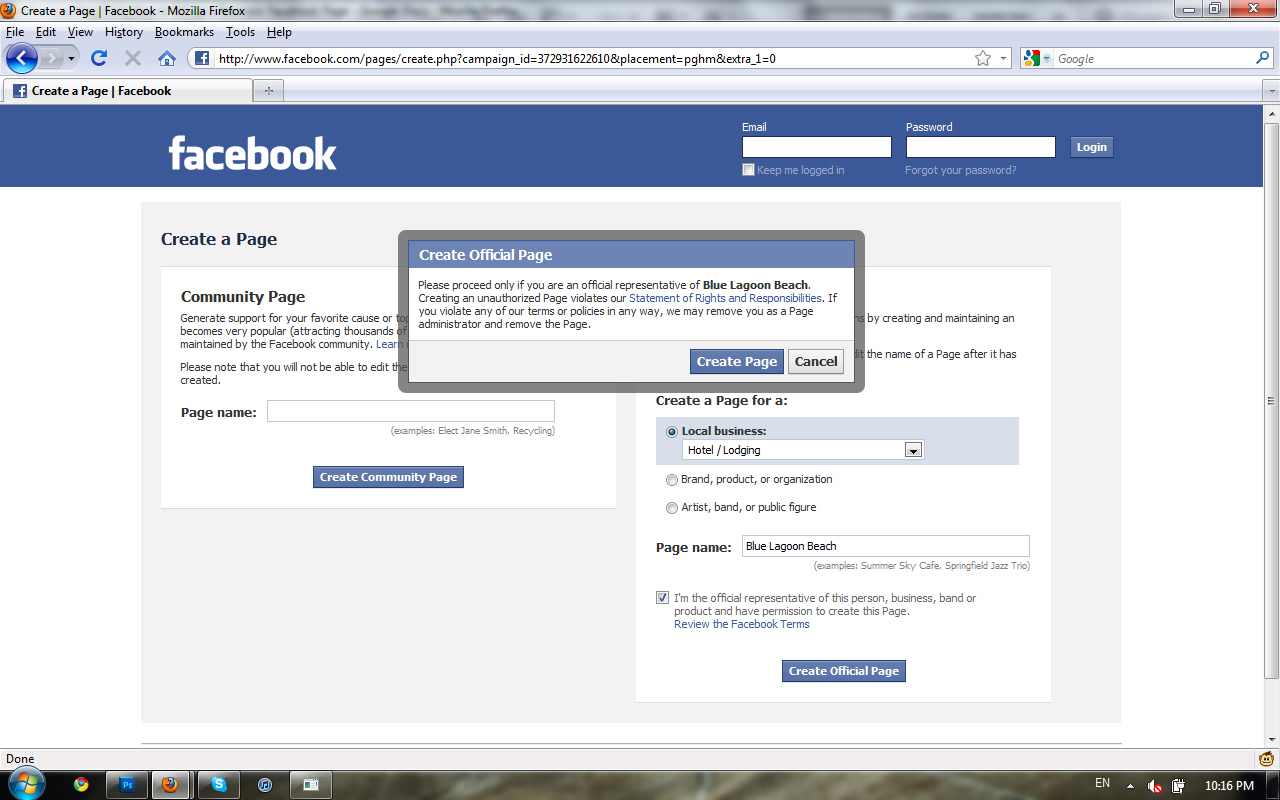
5. It will redirect you to a page where you can see two options: "I already have a Facebook account" and the "I do not have a Facebook account". Choose the appropriate button and fill in the required information, such as an email address and password, in the text fields provided. Continue by reading the "Terms of Use" and "Privacy Policy" links at the bottom and check the box next to it to acknowledge that you agree to the terms.


6. If you choose “I already have a Facebook account, it will automatically link your Fan Page to you personal account. If you choose sign up, check your email to receive the Facebook confirmation message and click on the link to officially register your business account and take you to your new page.
7. Set-up your page by entering content, such as your latest news or information, on the "Wall" tab. In addition, you can attach media to this posting, such as a link or video, by clicking these icons underneath the "What’s on your mind?" text field. Continue by clicking the box with the question mark on the left to add a picture that represents yourself or your business. Facebook allows you to select a picture from your computer, take a picture with Adobe Flash Player or choose an image from an album if you already have graphics on a Facebook account. Lastly, fill in the box title "Write something about [your name here]" box with your business description.

8. Continue to add other relevant information about your business by clicking the other tabs, such as "Info," and then click the link prompts or buttons to insert your data. When finished, click the "Publish this Page" link at the top of the display to officially make your business account live on the Internet.
Please note that sometimes, the page is automatically published. You can check if it’s already been published by clicking Edit Page, then click the Settings and there will be a drop down menu where it displays the published status.
